If you’re still on Zerto 9.7 or lower on the Windows Zerto Virtual Manager and have been asking for better role-based access controls (RBAC) for Zerto, then you need to get migrated over to the new Zerto Virtual Manager Appliance (ZVMA)!
About the Zerto Virtual Manager Appliance
The Linux-based Zerto Virtual Manager Appliance (ZVMA) made its debut in Zerto 9.5, and has since become the standard going forward with Zerto, as the last Windows version (of the ZVM) was 9.7. In Zerto 10, there is no Windows ZVM, so migration is now on the table and I’d highly recommend going that route to to prevent being left behind (and I will go more into detail about that in another blog post).
In addition to the underlying OS changing, came a modernization of how the ZVM has been architected. Instead of running everything as a single (or maybe a few) Windows services, Zerto has been built to run as containers on top of MicroK8s on a hardened Debian 11 virtual appliance. Please also note that because it’s Debian 11, the minimum vSphere version that supports it is vSphere 7.x.
That said – there is no separate software package to download and install; the ZVMA is now a fully-packaged OVF that you just deploy in vSphere. The best part is once it’s deployed, you’re ready to use it. This fundamental change on how Zerto has been built also introduced the ability to provide more frequent updates (quarterly) and virtually no disruption as each container can be updated independently without having to disrupt the entire functionality of the ZVM.
Now back to why you’re here…
While in the older versions of Zerto, there were some basic role-based access controls, they relied on vSphere roles, which meant that anyone who needed to log into Zerto would need to have credentials to log onto the vCenter client. This has all changed once you’ve entered the world of the Linux ZVM.
Instead of relying on vSphere permissions for each user, Zerto now has it’s own authentication services built on Keycloak (https://www.keycloak.org/), which provides you with a more secure posture when it comes to safeguarding your ability to recover from something as disruptive as a ransomware attack.
By removing the reliance on vSphere logins (which have typically been integrated to Active Directory), the chances of an elevated AD account becoming compromised will not affect Zerto’s operation because there is no dependency on those logins to get into Zerto. Not even the service account Zerto uses to manage API calls to vCenter can affect Zerto, because it’s not even managed by Zerto. While we’re on that subject, the ZVMA also supports MFA for added security. Additionally, you get to keep tighter grips on who actually has access and can log into vSphere while making sure your recovery environment stays protected/isolated.

Configure Role-based Access Controls in Zerto 10
In this section, I’ll cover what the role-based access controls looks like, what roles and permissions are involved, and how to set a user up and grant the correct roles, because when I first went through this, I didn’t find it as intuitive; so hopefully this helps if anyone reading finds themselves in a similar situation.
Note that before doing this, the assumption is that you’re already familiar with deploying the Linux Zerto Virtual Manager (OVF deployment via vCenter) and have already gone through and changed default passwords as well as paired to your vCenter. If you haven’t done that and need the information to do so, visit https://help.zerto.com for the deployment guide.
Also, this is not the guide for configuring Keycloak for any other integration such as Active Directory or Okta, for example. This is simply using accounts local to the ZVMA (in Keycloak). For other supported integration, visit the Zerto documentation at: https://help.zerto.com
Enable Roles and Permissions
Once you’ve completed the pre-requisite steps above, log onto the Zerto Management page at https://[yourZVMAIPAddress]/management. You must do this in order to leverage the Zerto Roles and Permissions through Keycloak.
- In the management interface, click on Security & RBAC on the left navigation bar.
- Enable the radio button for “No Access” under Roles & Permissions

Create a Keycloak User and Configure Permissions
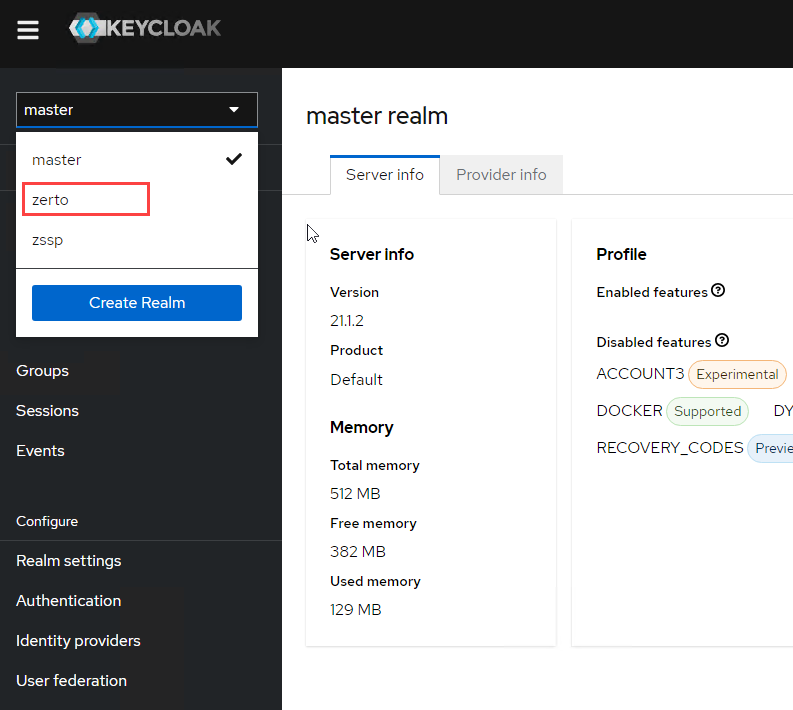
- Log onto the Keycloak administration UI at https://[yourZVMAIPAddress]/auth.
- Once logged in, click on the realm dropdown menu and switch from master to zerto.
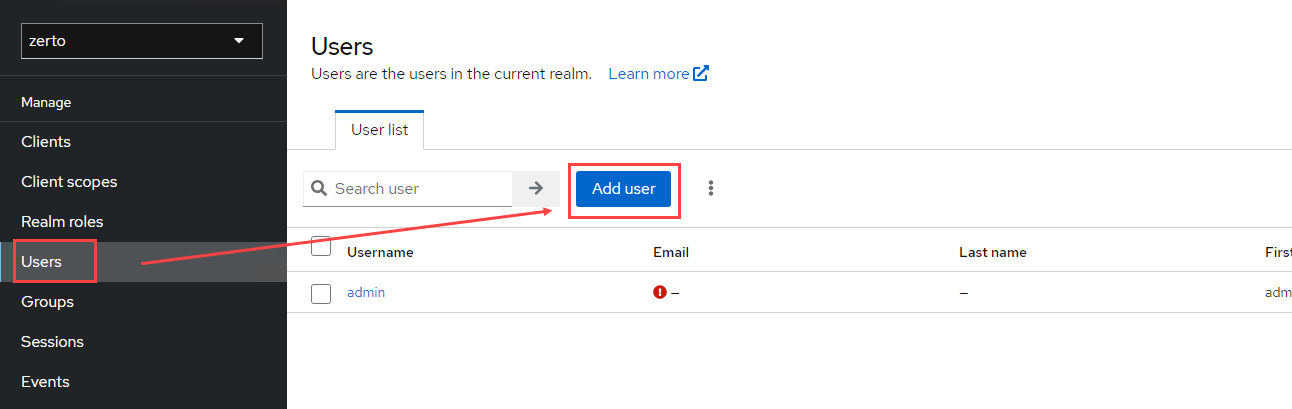
- Click on Users on the left navigation bar, and then click the Add user button.
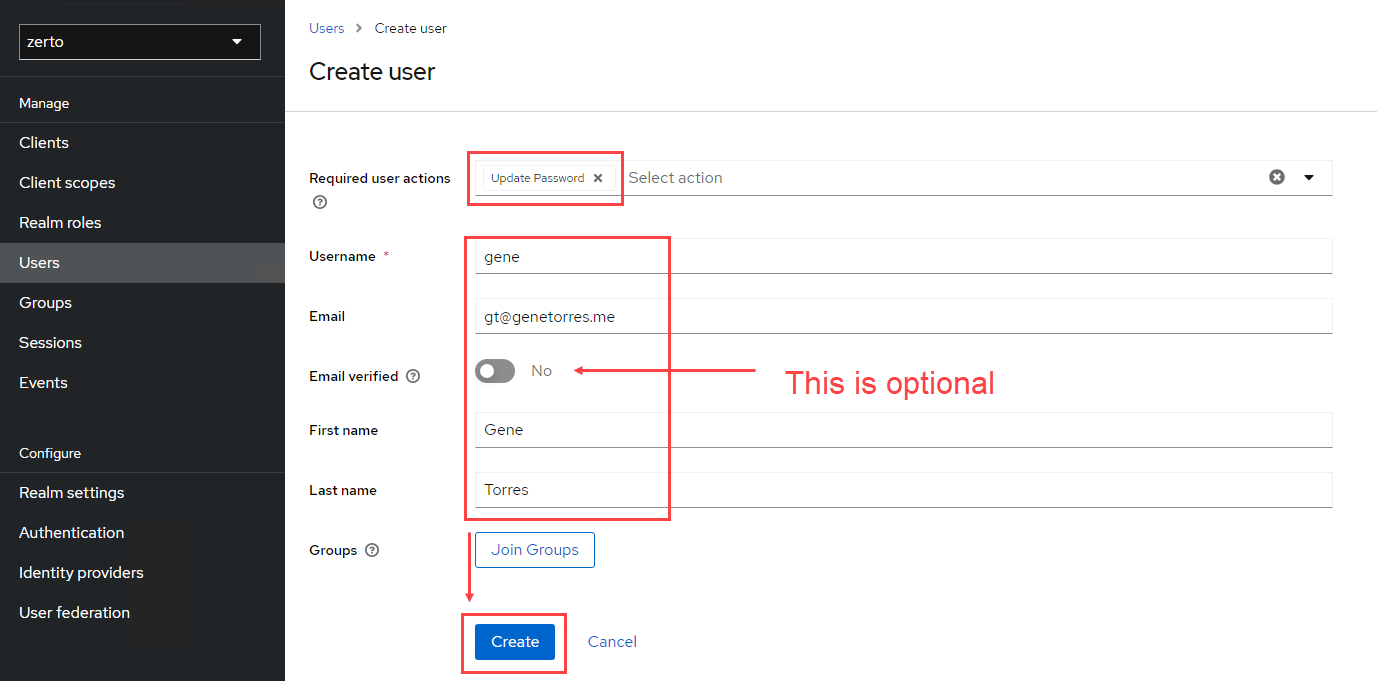
- In the create user window, set actions as needed, such as update password (change password upon initial logon) or any other options you require. Click Create when done.
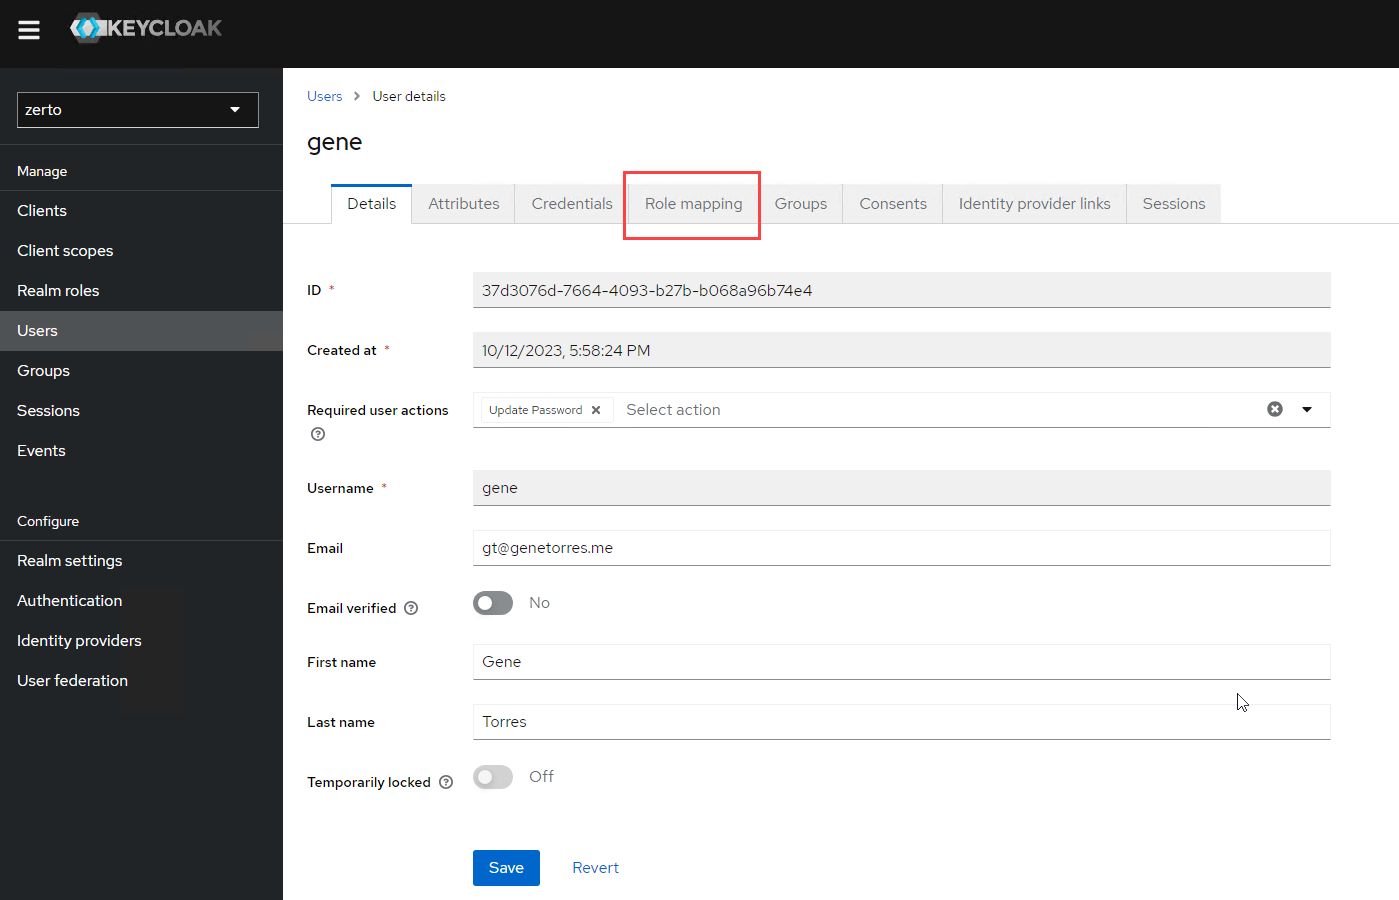
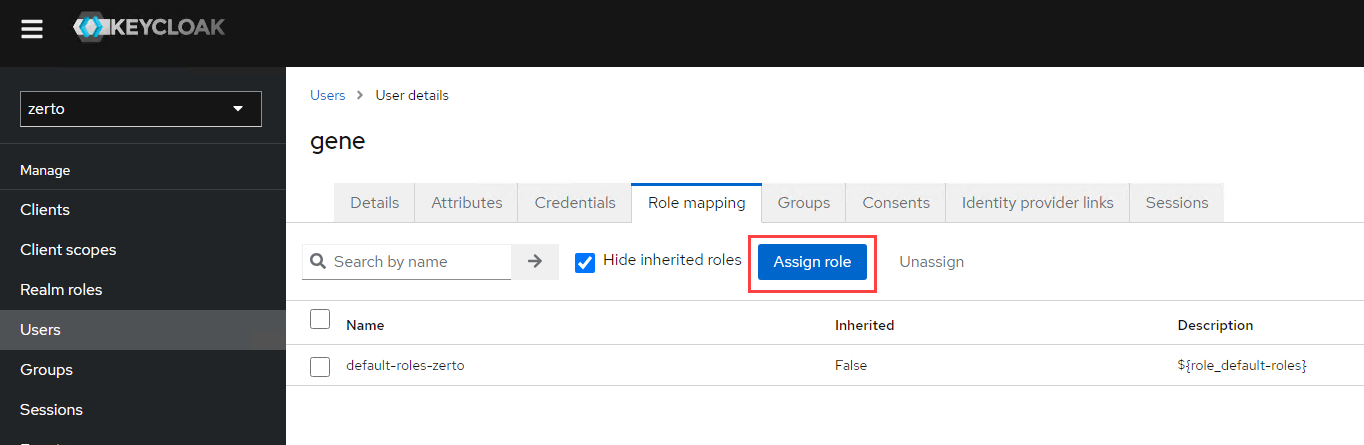
- You should now see the user details and several tabs across the top. Click on Role mapping.
- Click the Assign role button
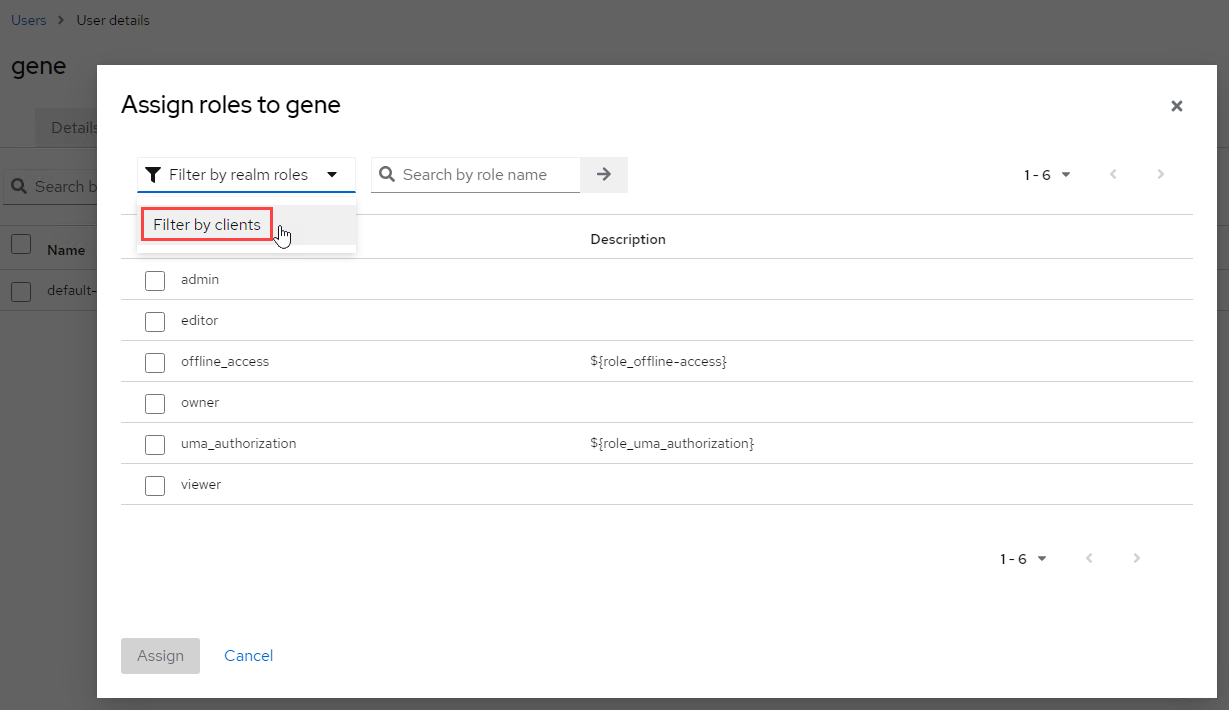
- At first glance, don’t worry if you don’t see any Zerto roles. (This is what got me and wasn’t clearly identified in the documentation). Click on the filter dropdown menu on the top left, and select Filter by clients.
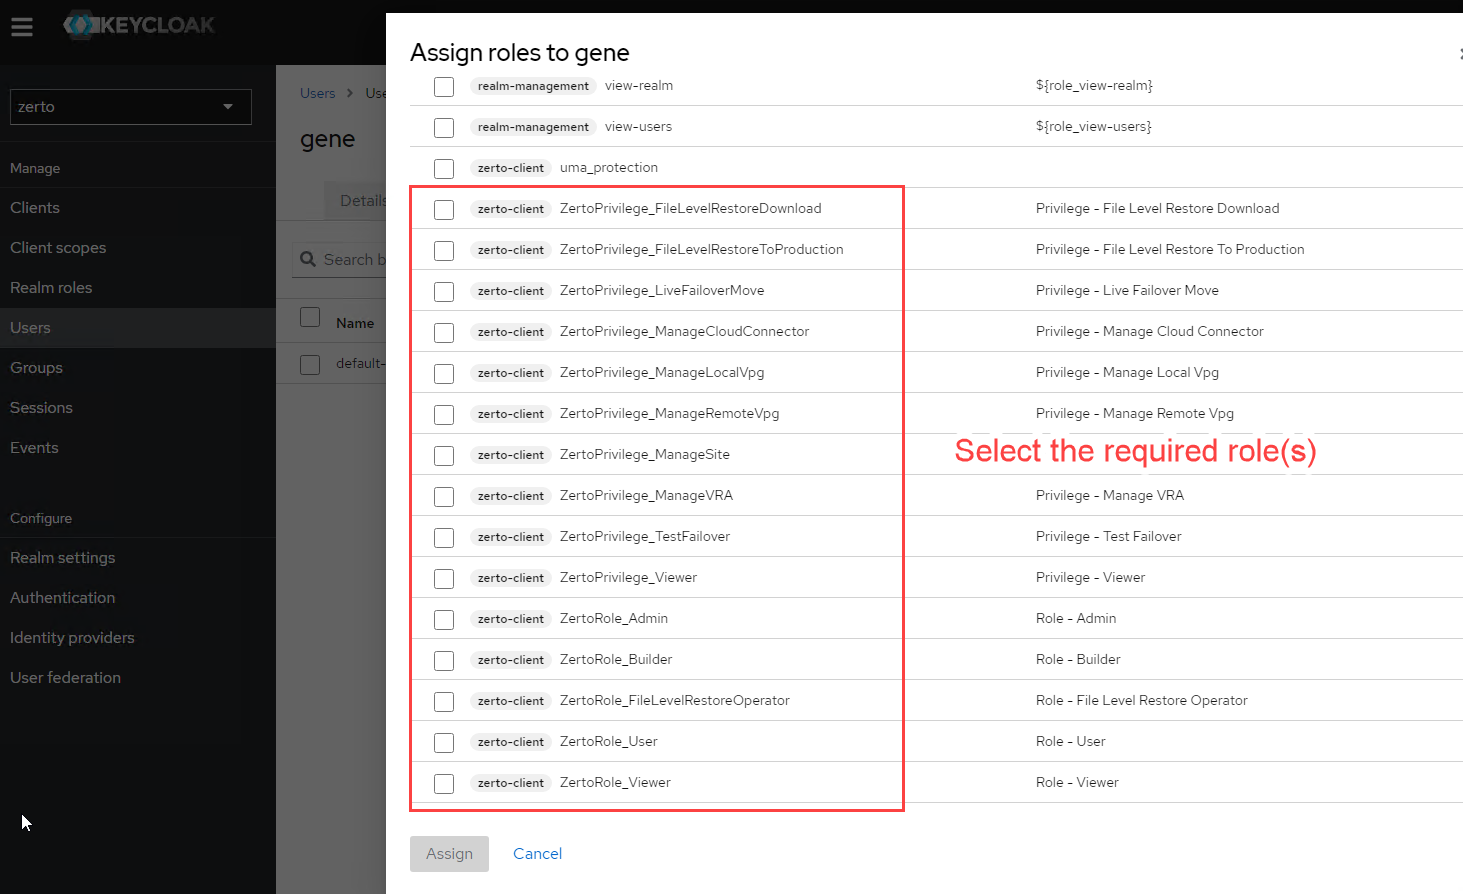
- You will now see a full list and a section tagged zerto-client. From that section, select the required roles for your user, and click the Assign button at the bottom.
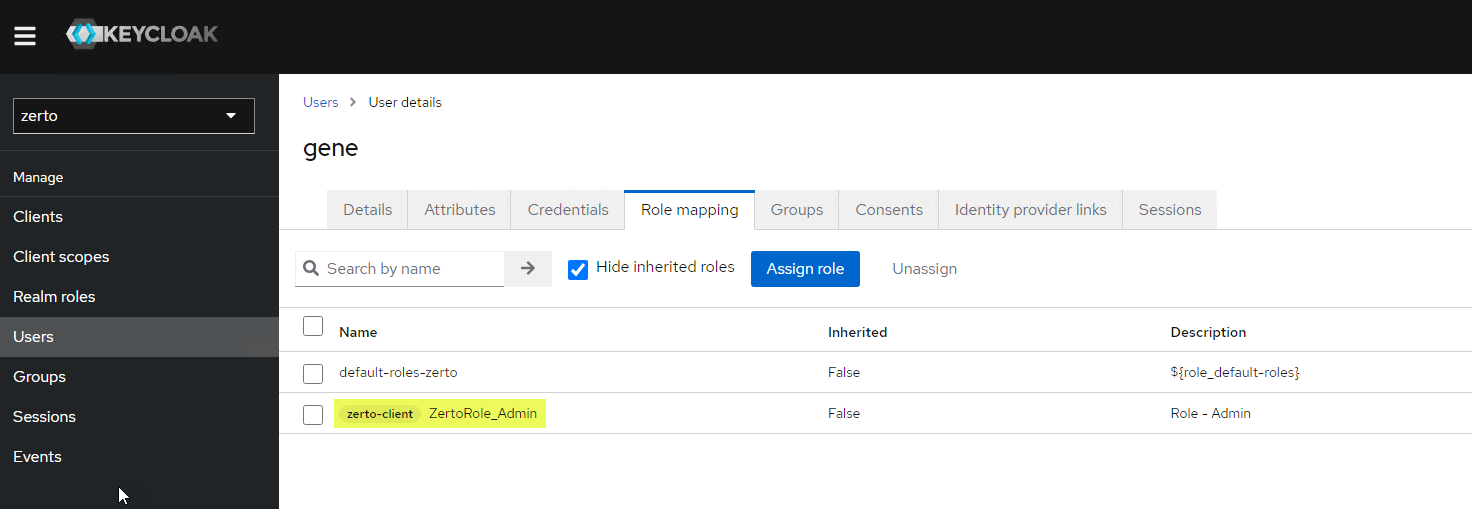
- You will now see the role(s) assigned to the user.
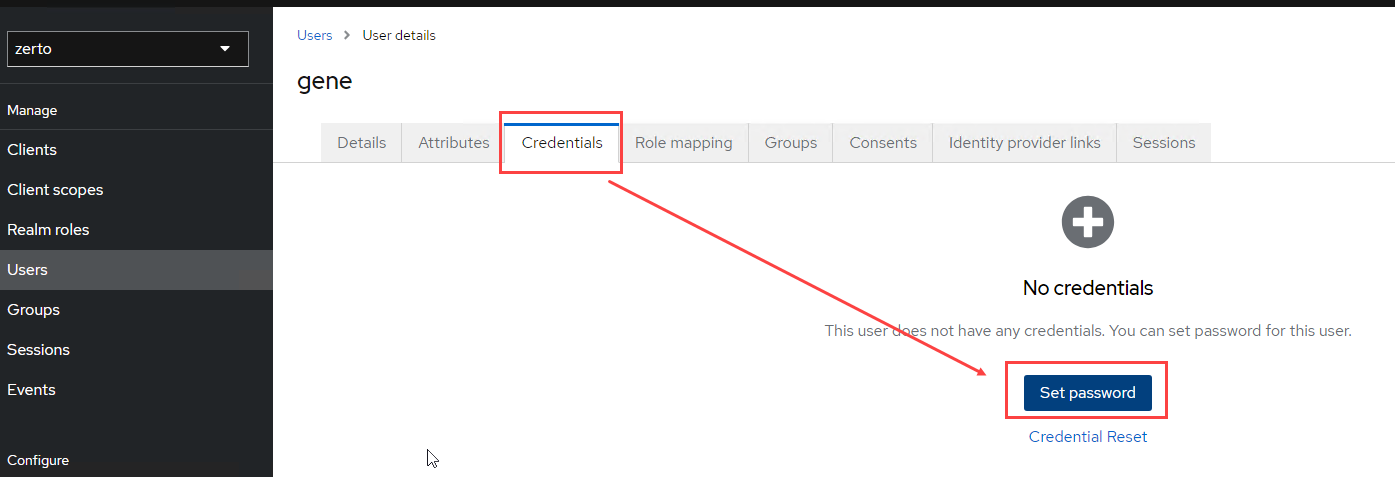
- Finally, before the user can try logging in, click on the Credentials tab at the top, and set the password.
Managing Zerto Roles by Using Groups
Maybe you don’t want to manage roles and permissions on a per-user basis, especially at scale. Besides, it’s a best practice to use groups for role management so you can simply add users to them down the road without having to repeat the steps above for each user.
So, if your preferred method to manage roles is by group, you can skip the steps above, and follow these steps and be on your way. Just remember, when you set users up, you still have to set the initial password and other options before they can login.
- If you’re not already logged into Keycloak, login at https://[yourZVMAIPAddress]/auth.
- Change from the master realm (dropdown on the top left) to the zerto realm.
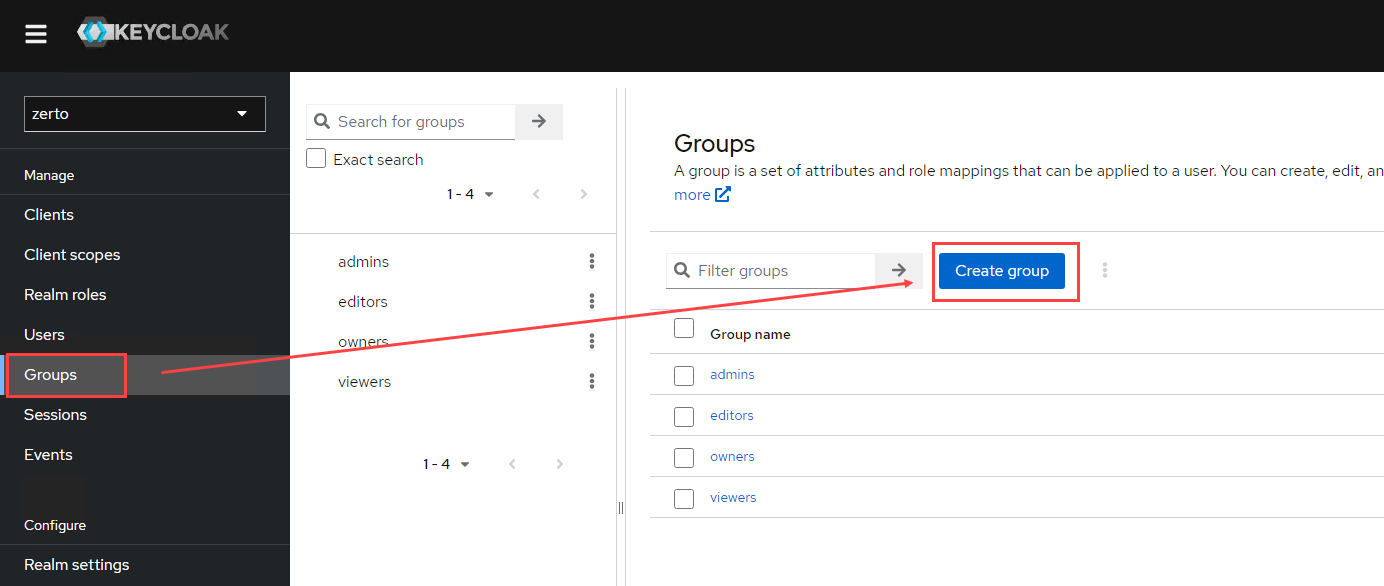
- Click on Groups under the Manage section on the left
- Click the Create group button.
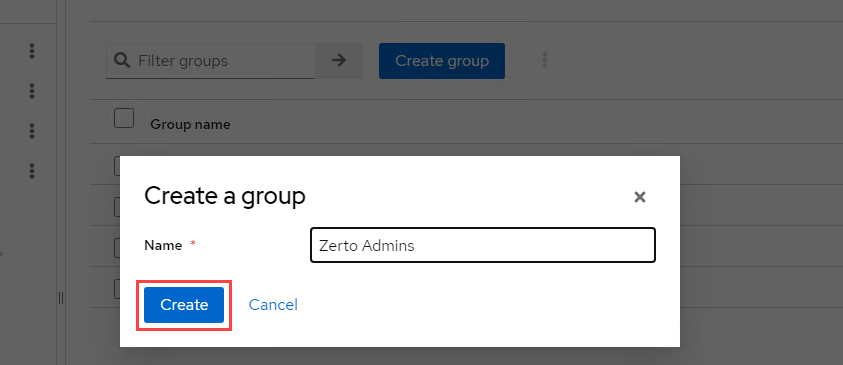
- Provide a name for your group and click Create
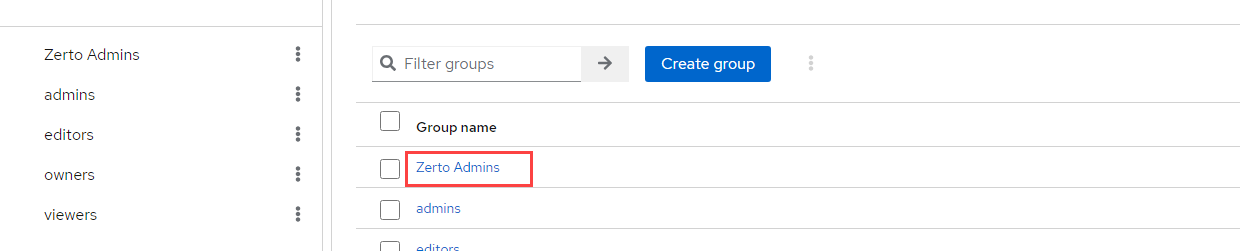
- Click on the group you just created.
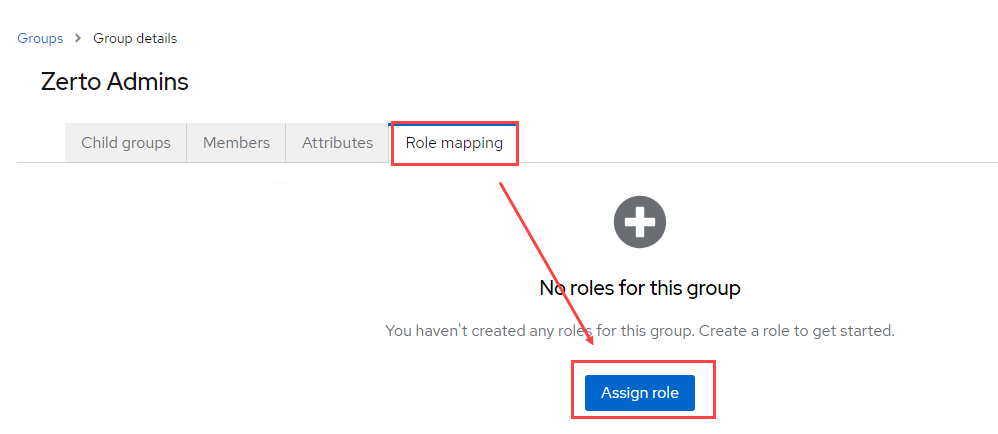
- Click on the Role mapping tab at the top, and click Assign Role
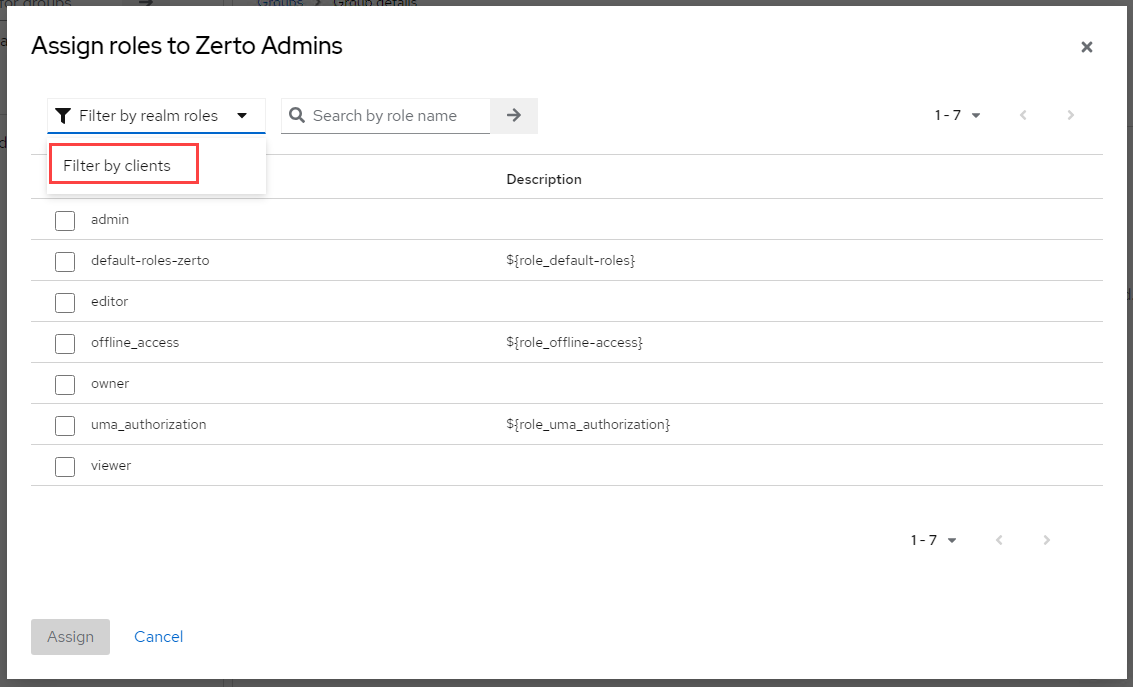
- Click on the filter dropdown and select Filter by clients.
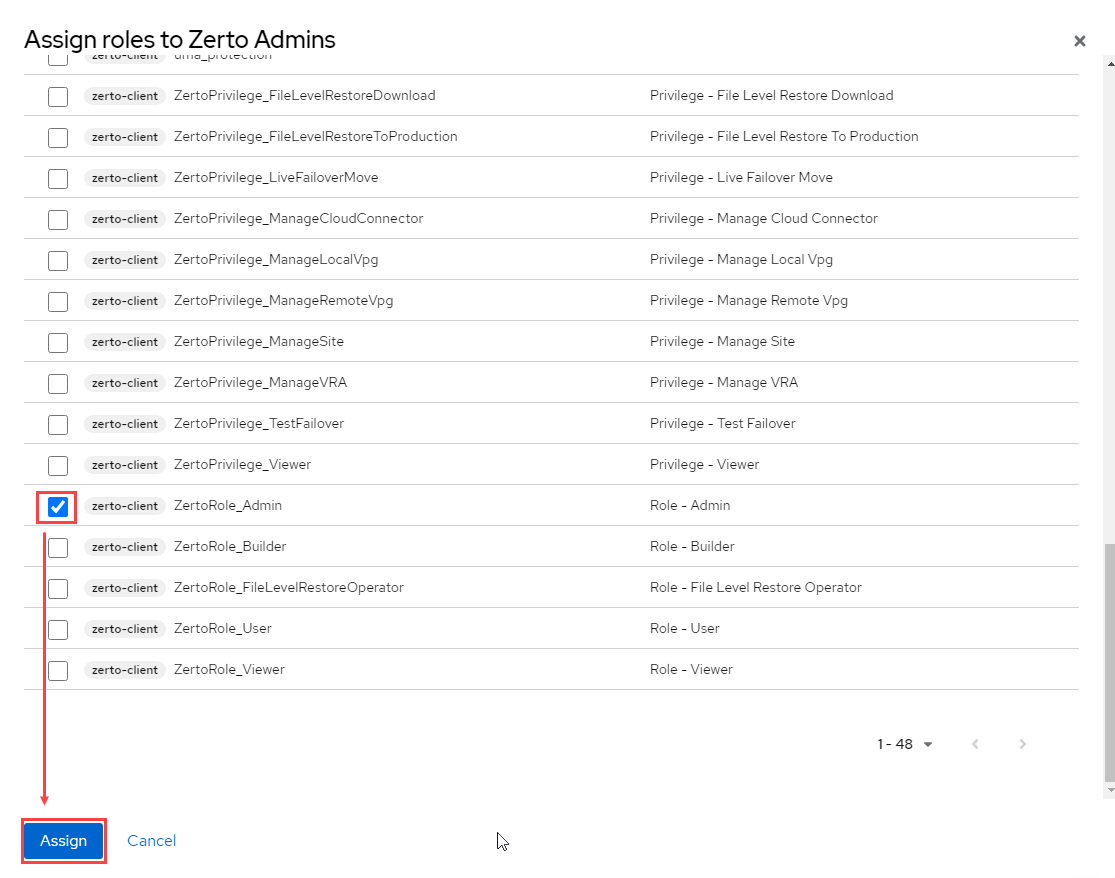
- Scroll down the list to the area tagged zerto-client and select the role(s) you wish to apply to the group you just created. When done, click Assign.
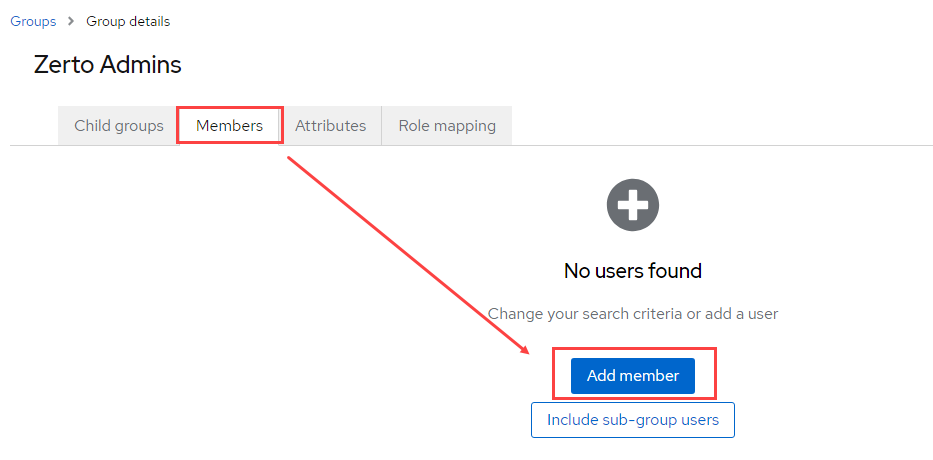
- Now, add members to the group (if you have previously created users – otherwise, create users and then add them to the group). Click on the Members tab, and click Add member.
- Select the users to add to the group as members, and click the Add button to finish.
Summary
Managing Zerto users in Zerto 10 via Keycloak doesn’t have to be difficult. It’s quite easy, actually, especially when assigning roles at the group level. By assigning different roles to different users depending on what they need access to be able to do, you’re not only exercising better access controls with Zerto, but you are also providing better security, able to create responsibilities for others without giving them any vSphere permissions, and also reducing your own operational/administrative overhead.
Now the question is whether or not to integrate with Active Directory – that is totally up to you. I’m going to leave you with this piece of advice though. Zerto 10 was built with Keycloak to isolate authentication and provide better security when it comes to recovering from cyberthreats. By choosing not to integrate with AD, there is no other way for bad actors to access Zerto, therefore giving you a better chance at quickly turning the tables on them and recovering to a point in time before any malware/ransomware took over. Zerto 10 also introduced in-line encryption detection, so your protected workloads will have a built-in early warning system, so you’ll be able to not only react faster, but be notified before all hell breaks loose.
Let me know your thoughts in the comments, and feel free to ask me any questions about what was shared here.
I will be working on additional Zerto 10 content, so stay tuned!