Continuing on from the previous blog about configuring array-based replication with SRM, in this blog post we’ll be going through configuring protection of a VM using vSphere Replication. The reason I’m doing this instead of jumping right into creating the protection groups and recovery plans is because vSphere Replication can function on its own without SRM. That said, we’ll go through the steps to protect a virtual workload using vSphere Replication, and follow this up with creating protection groups and recovery plans, which come into play in either situation (ABR vs vR) when we get to the orchestration functionality that SRM brings to the table.
vSphere Replication is included with VMware Essentials plus and above, so chances are you have this feature available to you to should you decide to use it to protect VMs using hypervisor-based replication. In my experience, vSphere Replication works great and can be used to either migrate or protect virtual workloads, however, as stated above, can be limited. See this previous post for the details of what vSphere Replication can and can’t do without Site Recovery Manager.
Procedure
In this walkthrough for protecting a VM using vSphere Replication, I will be performing the steps using a decently sized Windows VM as the asset that needs protection. This VM is a plain installation of Windows, however, I use the fsutil to generate files of different sizes to simulate data change.
- In your vSphere Web Client, locate a VM that you wish to protect via hypervisor-based replication.
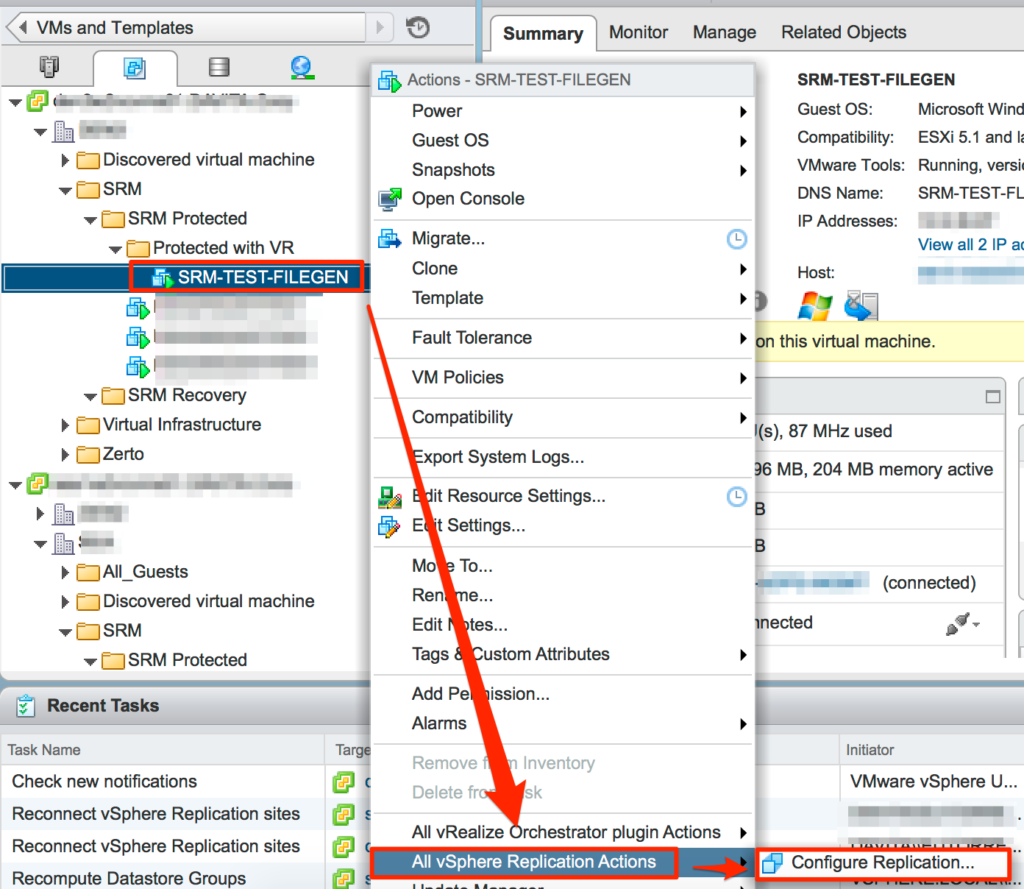
- Right-click on the VM and go to All vSphere Replication Actions > Configure Replication.
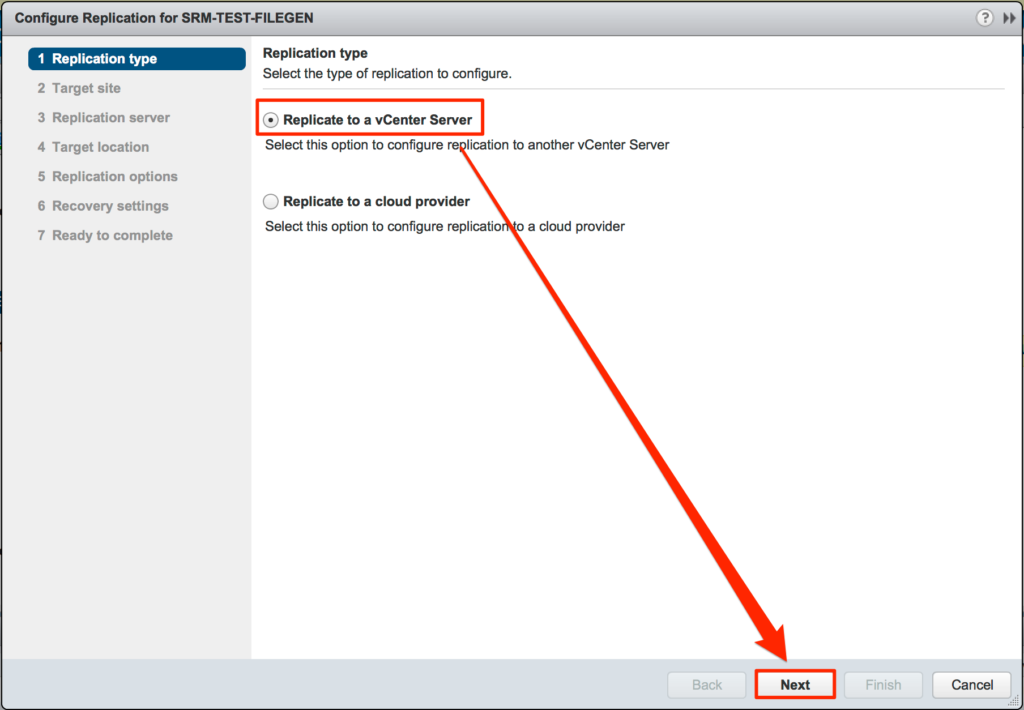
- When the wizard loads, the first screen asks for the replication type. Select Replicate to a vCenter Server, and click Next.
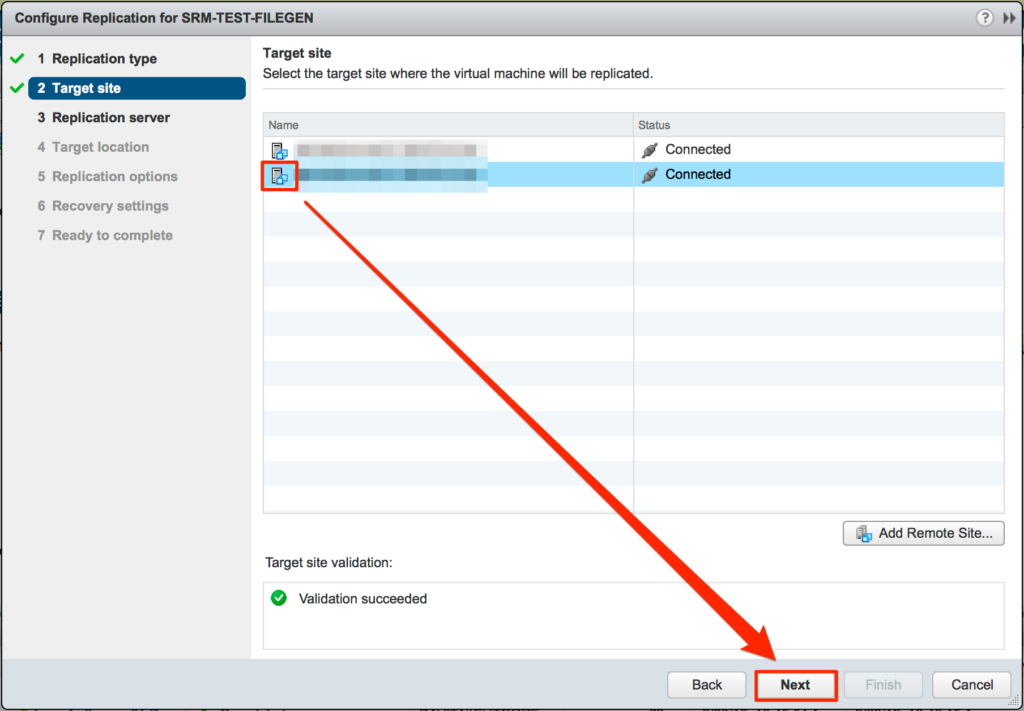
- Select the Target Site and click Next.
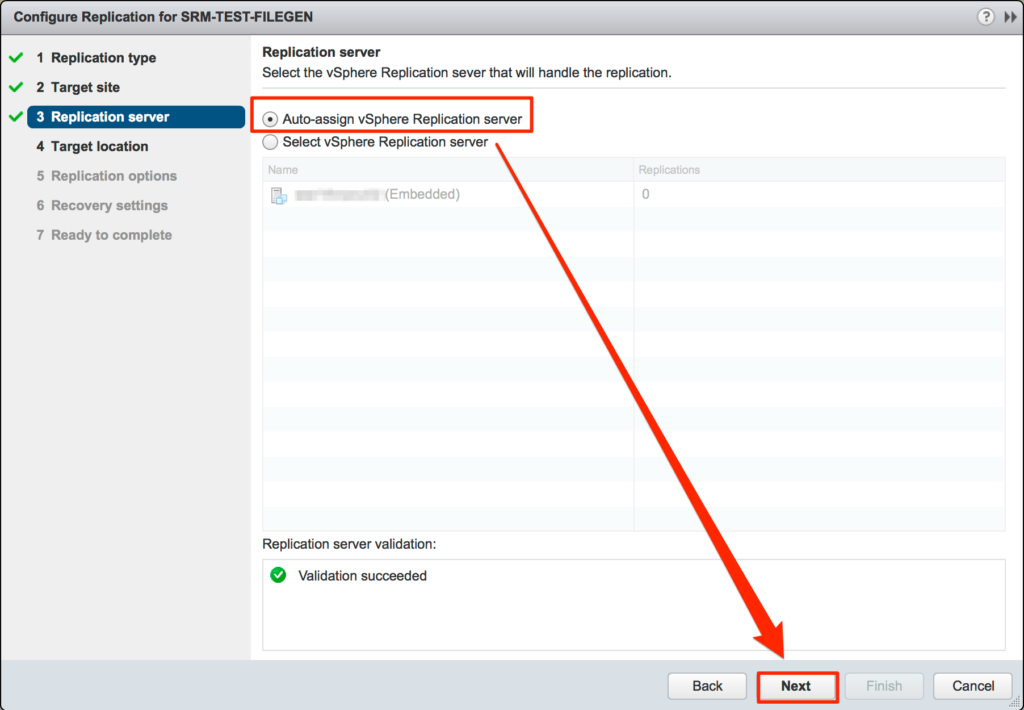
- Select the remote vSphere Replication server (or if you only have 1, then select auto-assign), wait for validation, then click Next.
- On the target location screen, there are several options to configure, so we’ll go through each one by one:- Expand the settings by clicking the arrow next to the VM, or click the info link.
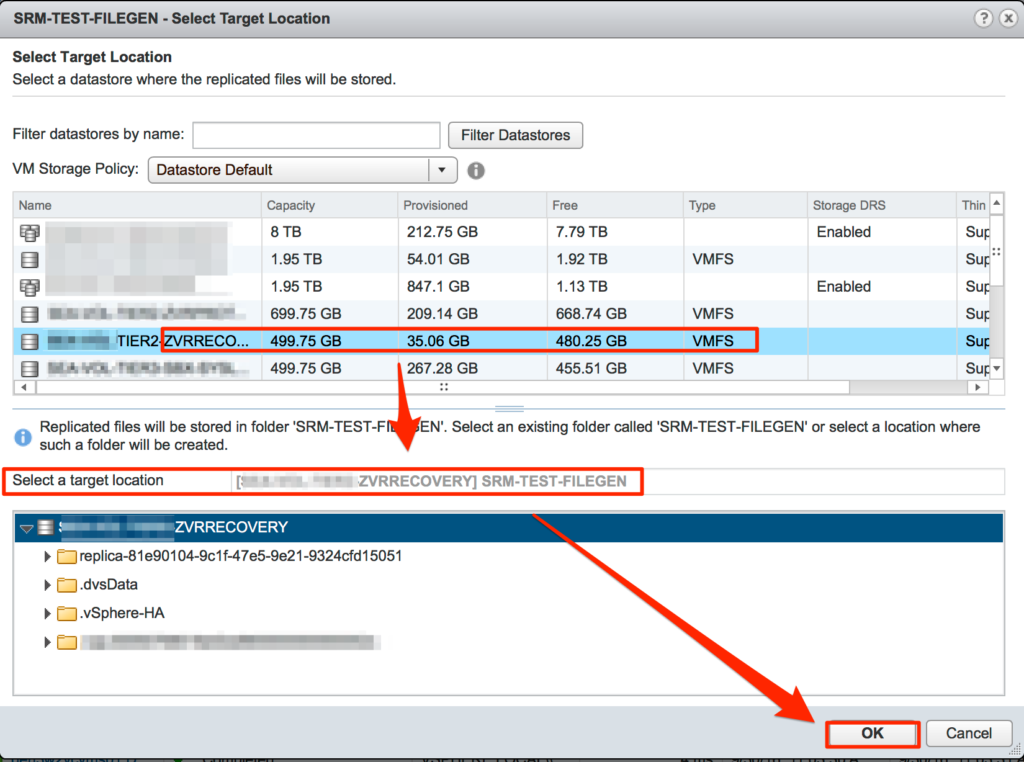
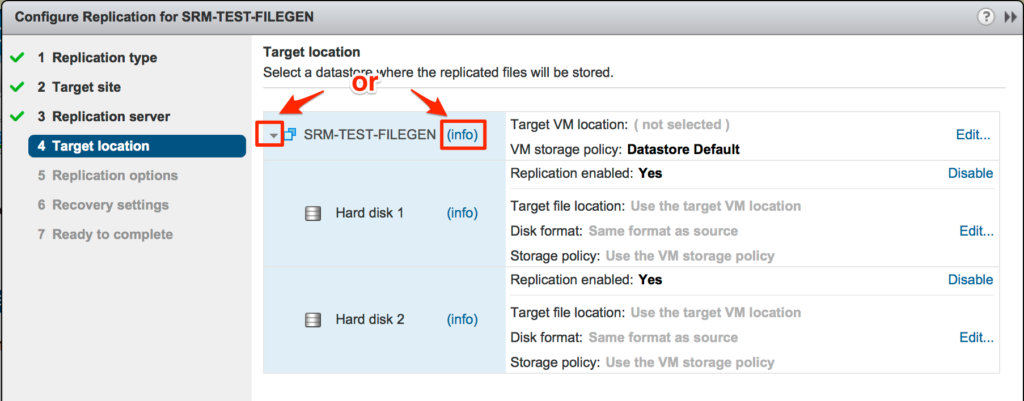 – Click edit in the area labeled Target VM Location, select the target datastore and location for the recovery VM, then click OK to be returned to the previous screen.
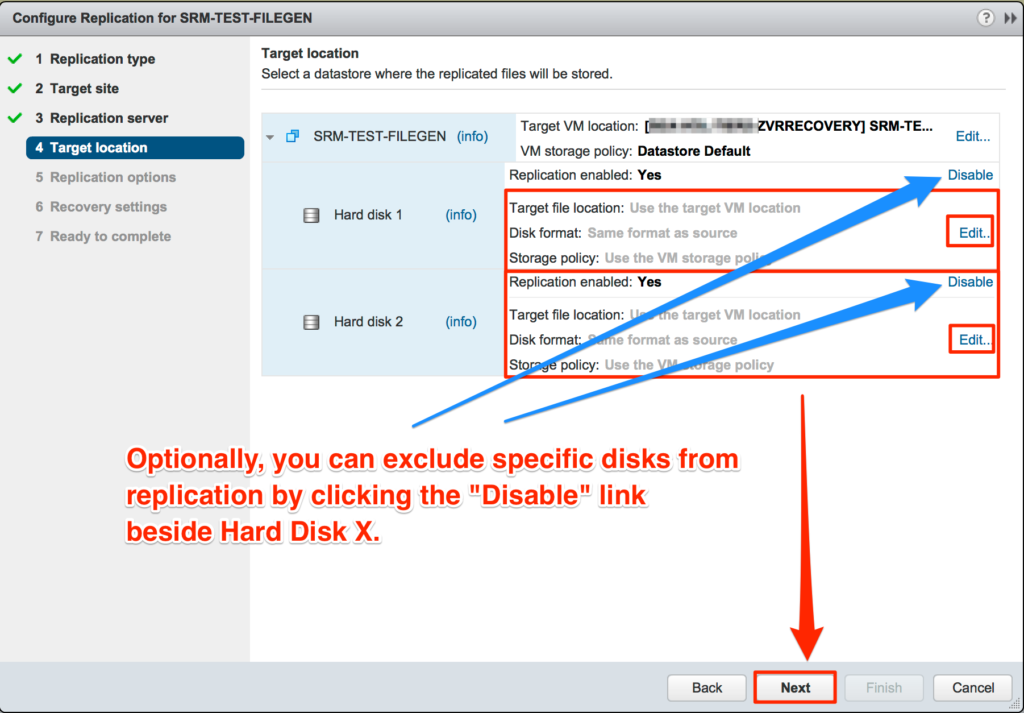
 – Typically, the previous step would be enough, however, if you want to place VMDKs in specific datastores, edit their format (thick vs. thin provisioned), or assign a policy, use the edit links beside each hard disk. Once all your settings are how you want them, click Next.
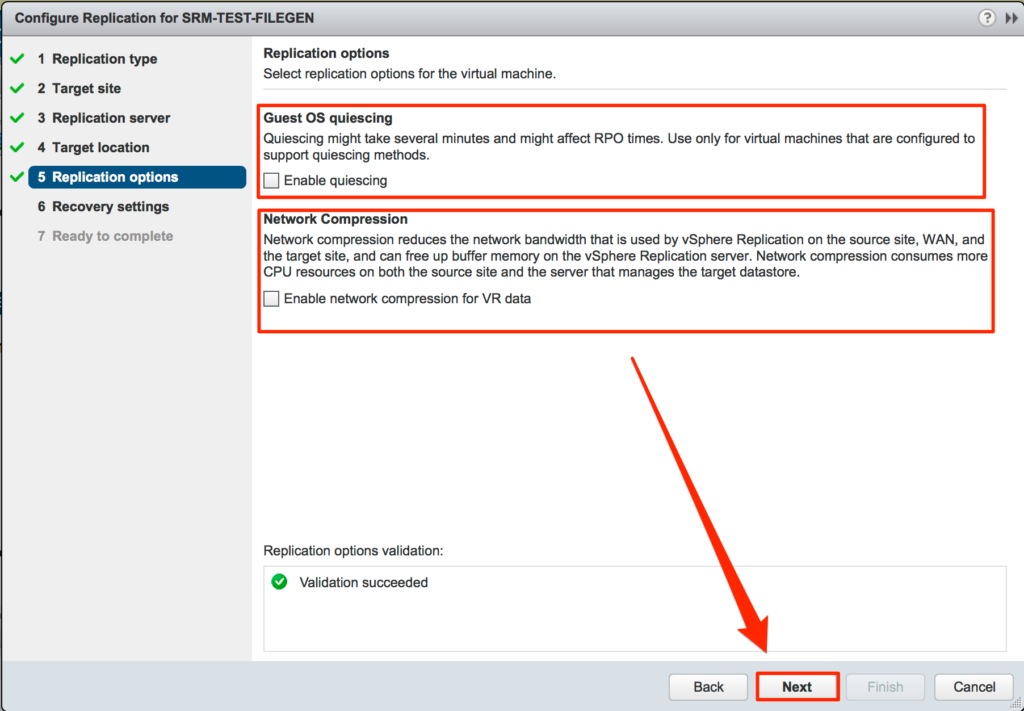
- Specify your replication options, then click Next.
Notes:
- Enable quiescing if your guest OS supports it, however, keep in mind
  that quiescing may affect your RPO times.
- Enable network compression to reduce required bandwidth and free up
  buffer memory on the vSphere Replication server, however, higher CPU
  usage may result, so it is best to test with both options to see what
  works best in your environment.
- Configure RPO to meet customer requirements, enable point in time instances (snapshots in time as recovery points – maximum of 24) if needed, then click Next.
- Review your configuration summary, make changes if necessary, but when you’re done, click Finish. As soon as you finish, a full sync will be initiated.
There you go, configuring vSphere replication for a VM. The next post will cover creating protection groups and recovery plans, which we will then tie into what we’ve just performed here and with the array-based replication post.